Taking the Zinnia out for a spin

I’m on a bit of a roll, bit like buses I guess, nothing for months and then 3 at once. Hopefully my sister won’t read this entry until she get’s her present. If not- then I apologise already that I put your gift on various bits or ground and dirt all over Canterbury.

Again this is from the shops blog so a little bit promo esque. There is a few extra things I’ll say, I have difficulty reading pattern instructions at the best of time and this is down to my impatience generally. But I occasionally l have problem with the way a bit is written. This happened with the waist band for the Zinnia. I just went with my gut instinct because I couldn’t make heads or tails of the instructions.

I think sewing is quite instinctive- I follow a lot of patterns to a point but then go off on my own with the bit of knowledge that I have. For me it’s how I learn I suppose.  I think many sewist’s develop their own ways of sewing and that comes from learning from your mistakes. It’s like anything really.

Anyway off we go!

img_20161021_110737

I must admit this wasn’t the first fabric choice that came to mind when I first decided that Colette Patterns Zinnia skirt was going to be my next project. That honour had gone to  beautiful Les Fleurs folk birds fabric in canvas. But then I was afraid  about cutting up such expensive fabric without at least test running it first. Second choice was Melody Millers Trinket Telephones in navy.


But this is where I ran into my first hurdle. The pattern layout was to be cut on the crossgrain and in the opposite direction of the print. Not being a seasoned sewist , I had an idea of how to solve the problem- but not having the confidence or ever working on the cross grain before- I was worried that if I had cut the fabric on the grainline that I would somehow mess with the structure of the skirt.

Luckily my Colette rep is awesome and very lovely and understanding to answer my novice questions, with the above photo attached. I was told that my gut instinct was correct and it will work. I was still too scared to cut into folk birds (they did suggest that if you do use the canvas / linen that I should put a lining in also. I’ve never put a lining in before- bit scary)

So it was my sisters birthday and I promised her a skirt. She liked the Les Fleurs Tapestry in black– so here was my chance to do a test run before I tried the linen.


So I laid out the pattern like in the picture and then had to Frankenstein sew the corners cut from the sides to the edge to get the full coverage. Due to the busy pattern you couldn’t really see where the joint was made thankfully.

Pleats went in easily, and the body of the skirt- including the brilliant pockets (using some of my table runner fabric again!) was finished really fast. But I started to look at the finished panels and thought – this is not going to get around my waist. I sized it up against the waist band and it came up too small (and I had cut the pattern a size up in parts). So out came 2 of the pleats from the two back panels and that remedied the problem.  Always check before you attach the waist band! Zip went in fine, thankfully…I don’t like zips.

We come to the waist band. I’m not really a follower of instructions. The waist band instructions need a bit of concentration. It was late- so instead I winged it. I folded down the seams  by about 1/4 of an inch (old quilting ways die hard) facing the wrong side of the fabric the attached it to the raw edge of the body of the skirt and top stitched it into place. It worked, it probably doesn’t look as good.


This does cause a small problem when you have to attach the button but it would have been fine, had my machine not given me so much grief….But although millimetres off, I’m ok with that.


I’ll be making the zinnia again, now I know it’s quirks and it knows mine. It’s an easy pattern- but may be worth doing a practice run first before you cut into your gorgeous rayon.

img_20161021_103255013

Sewing with the Ruby

So you have a meter of a lovely piece of lawn for example , but it could be anything really. And you want a super fast sew , that doesn’t require a lot of construction . Meet the Ruby from Made by Rae patterns!

static1-squarespace-3

I had some beautiful Cotton + Steel Cookie Dough in lawn that I have had sitting in my stash for a couple of years, but only a meter of it. I paired it up with some beautiful linen which was not only a great contrasting fabric, but also gave a great weight to the top of the bodice , letting the lawn flow nicely underneath it.

The pattern gives you the option of making either a dress or shortening it to a top. As I only had a meter, a top it was.

The pattern is great for beginners, it has very little detail on it and it’s printed on normal paper, not tissue paper making it easier to trace using Swedish tracing paper and then packing it away for the next time.

static1.squarespace-4.jpg

Construction of this is really straight forward. If you have made the Germanium for a little girl this is the same kind of pattern. Separate top bodice and then a gathered body all  sewn together. There are no zips or buttons either!

There are a few options to finish the raw edges around the neckline and armholes. I went partially lazy, bias binding finished with a sewing machine. I could have made proper bias binding to match the two different fabric., but I’m not the most patient of sewist’s . So although I didn’t make it exact, I did make my own bias binding- but I did not finish it neatly by hand..my hand sewing skills leave much to be desired.

static1.squarespace-5.jpg

Making bias binding is always easier than I remember. I always go into it dreading it a bit, but end up doing it all quite quickly (even without using my bias binding maker, which is missing somewhere!). The instructions ask that you cut a fat quarters worth, but I didn’t need that much and stopped half way and still had quite a bit of binding left over.

It’s a great little sew and I adore the feel of Cotton and Steel’s dress making fabric, it’s a dream to work with.  The one thing I will say is that when I make this next time, I won’t make the gathers as close together. I’m a busty lady, and the excessive gathers can give my chest a bit of a mountain’s look.

From Runner to Scout Tee Magic

Hello there.

Today is another post from the stores blog. The next one will be too. It would be nice to write one of my ranty blogs soon going on about something or other. But I’m finding less and less time to do anything like that. So Instead your getting a blog about how I transformed some table runners made out of dress making fabric back into a top.

static1-squarespace

It all started off as a table runner.

I should start, at the start. I bought some of Art Gallery’s fabric Morse Dot in Ash by Katarina Roccella with a view to make it into to table runners for my bright carnival style wedding. It arrived in store and it was beautiful! More softer and silkier than other fabric’s that are in the medium weight category (All of our Art Gallery cotton’s are like this, they are lighter making them ideal for dressmaking as well as quilting). We cut up four meters of it, cut it in half , hemmed them round the edges (all the day before the gathering) and laid them out. They looked pretty awesome.

After the wedding I started to unpack all the decorations.  Pondering on what I was going to do with 8 table runners It dawned on me- after holding them up against me- that I could probably turn at least 3 of these into a simple top. I had made a beautiful top out of the Scout Tee pattern before using rayon (you can read that here). I love that pattern, so I thought I would give it another whirl. I washed them and all the wine stains came out without even needing stain remover, bonus.

static1-squarespace-1

I first had to sew the runners together to get the correct width. I was worried that it could look odd having a big seam running down the centre, but I think it looks fine.

I love the ease of this pattern, I used 1.75 meters for the whole thing. You do have quite a bit of fabric left over on the sides. The nice thing about making it out of a medium weight cotton is that I can use it for any other projects. Mine normally go into scraps for quilting (I’m all about using scraps for quilting!)

static1-squarespace-2

It’s the kind of sew you could have done in a few solid hours there are only 5 pieces to it front, back , sleeves and the neck binding. I had to redo one of my sleeves because one side wasn’t as gathered as the other side- and that annoyed me. Also watch when sewing the binding on that it’s wide enough to cover the raw edges. On my first go on this top my bias binding was a bit thin and after about 6 washes the binding started to come away from the top (that may also have something to do with it being made out of rayon).

We still have some of the Morse Dot Ash still left in stock , as well as the Scout tee pattern if you fancied making your own (maybe without the middle seam).

It’s been a while but I’m back

I know I know, it’s been awhile since I’ve put anything and in the mean time quite a lot has happened. I got married (yes I know!), I had birthdays, other weddings, visitors from Australia, finishing quilts, making clothes, the shop is slowly starting to take off and there is a quite a few changes going on at my other job, no more taking it easy.

But I have written a whole heap of entries that I will pace out. Baking success, and failures, trying to to put together the cheapest wedding possible and so on. But today I’m going to start easy with a quick dress I made up quickly for Rockette. I have lifted it from my shops website  (just so you know).

Hello Sushi!

Sushi dress 1

Since the release of Cotton + Steel’s 2016 Spring collection I have loved this Sushi’s antique’s from Sarah Watts From Porto with love range. I’ve been looking for a project to use this with, and my little one decided this week when she saw it that she and her Rapunzel doll both needed dress made out of it.

I’m was looking for a quick-ish sew and I found it while having a little mooch in my sewing books. Sewing Girls Style is by Japanese pattern maker Yoshiko Tsukiori. It was first time I had used the book but glad I had picked an easy pattern, which was excitingly titled Pattern W.

Coming mainly from using independent pattern makers work for a single pattern, this one was all a bit mad. Parts of the patterns were on different sheets and all of the patterns overlap each other in no particular order. Bit of chaos but once you get used to it , it was straight forward.

I traced the pattern using Swedish tracing paper, and it was only 3 pieces (joy!) , one for the whole dress and two bits for the interfacing on the neckline. The pattern called for linen, and that is great for Autumn/Winter as it would give the dress a more a-line shaped dress. The medium weight cotton of Sushi gives it a more flowy relaxed, less formal look. I wasn’t too sure if it was going to work without the stiffness but, I think it worked out great.

I finished it within an hour and a half, it was so easy and it looks so cute in the amazing cat fabric. There is a jacket that goes with this but it seemed a bit too time consuming.

To make Rapunzel’s dress I just sketched out a basic sleeveless a-line dress on some tracing paper and cut out the fabric. Placing right sides together I sewed the shoulders and the sides together. I then zigzagged around the neckline and folded and sewed the hem at the bottom. I left the armholes because it was 5 pm and I couldn’t be bothered.

Once finished the dress was a bit wide so I tied some bias binding around the waist and tied it in a bow round the back. Done, I’m hoping Rapunzel liked it, it suited her.

You can see Sushi in our shop here , but we don’t carry the book,  hopefully your friendly local independent book seller can help.

I will be back again soon with some more entries!

the geranium in bloom

Well hello! Another rehash of the shop blog! As I nurse my painfully badly bruised knee back to health (thanks Canterbury city council for keeping your walk ways clear of packing tape) here is the one of only 2 May makes I managed this month

geranium dress


Last week we got our first kids pattern in, yay! I find a lot of children’s dress patterns a bit frumpy, a bit ruffled and a bit over the top. The Geranium by Made By Rae patterns is none of that. it’s basically the Washi dress in kids version. (and without the elastic shirring!) You could have a matching set if you felt inclined. Beauty of this is you can use so many different fabric’s, I love patterns where you can use medium weight quilting cotton- it just opens up the scope of possibility.

washi:geranium

There is 2 different versions in this pattern, it can be made into either a dress or top with three different sleeves versions and three different neckline and the option to make it ruffled or pleated.

bodicedetail


I opted for faux capped sleeve. basic neckline and a ruffled skirt , mainly because I’ve done much gathering and never pleated before and the ruffled sleeves looked a bit beyond my easy, quick Saturday morning frame of mind- and pocket version.everything has to have pockets!

pockets detail

I’ve made up the biggest size, which is a 5 but it is on the smaller size (I was making it for my skinny minnie) so may need to add extra to the top bodice if need be. I used a meter and a half of the Cats heads in blue by Wee Wander Gallery, the good thing about this fabric is the heads are small enough that I didn’t stress out too much about pattern matching. I can be lazy with stuff like that.

completedback

The construction is straight forward, As usual I used the Swedish tracing paper to begin with (used on the GBSB didn’t you know) The rest was a breeze, unless you count when I read the pattern wrong and closed the wrong bit of the bodice – (then lost the seam ripper for a full 20 minutes- That made me loose it). Obviously I’m an impatient person and I only ever skim pattern instructions- always resulting in unpicking, (I NEVER learn).

backbodiceSo that was it. A nice make. It went out for a walk around London on Monday, and it didn’t fall apart which is always a bonus – and it has even been in the wash and come out in one piece on the other side- no fraying whatsoever, winning!

geranium

Making the Bettine dress

Hello, it’s been awhile hasn’t it?

There’s been lots going on, but if you randomly ask me, whats been happening, I will probably say oh nothing much. I’m behind on all of the wedding prep..like way behind and I will say that I got a some new patterns into the store , a whole 6 of them and it took a massive, massive chunk out of my Sunday to add them all on, cross reference everything, do the social media thing pause for a ballet rehearsal (not mine lol! I would look pretty bloody bad in a tutu.) and that was all of Sunday. I think I underestimate how long it takes to do  EVERYTHING.

So this is a bit of a rehash from my shops blog but I know not the whole word reads that so I’ve added it here with a few extra bits. (I’m insinuating the whole world reads this…errr No, I’m fully aware it does not.)

Making the Bettine..this took me 5 weeks to finish..and I went up an arse size in between, why did it take so long?

Reason 1,  I made half of it and then my front room was full of junk and I couldn’t get to anything, finally Mr CM had a BBQ, panicked that people were going to walk through the house and finally cleaned it up. (I was on protest- it wasn’t my stuff clogging up the front room,and I wasn’t going to clean it all up…even if it did get on my tits. I’m sure he will strongly disagree with this and there will be some kind of mini disagreement. With a lot of annoying nasal sounding errrrr’s)

Reason 2 Biscuits.

static1.squarespace

So here it is, I warn you there is some shameless linking and promotion in this.

Making the Bettine

It’s May and a lot of sewist are making loads of amazing things for May Makes, which is making me feel unproductive. So I took some action! We have some great budget chambray (£8 a meter!)  in our store and I debated between 3 different patterns to use it with, so I put the question to Instagram- because that’s what you do in 2016 right?

patterns+from+the+crafty+mastermnd

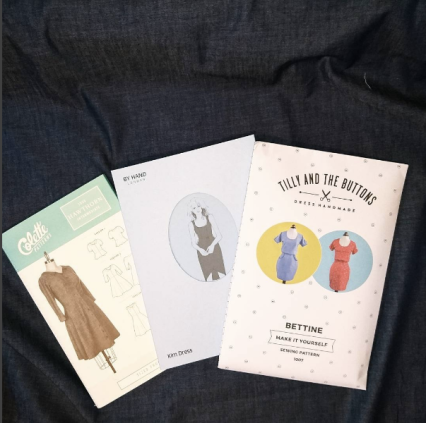
So I put it out there and it came back that I should make the Bettine, which I was glad for as I wanted an easy fast sew (I say fast.. it took a month!) . The only problem I wish I could foresee was that I ate too many biscuits between cutting the pattern and making the pattern.

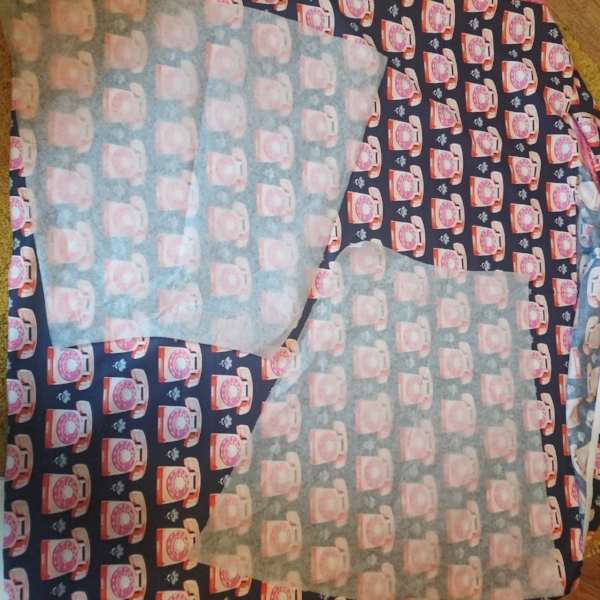
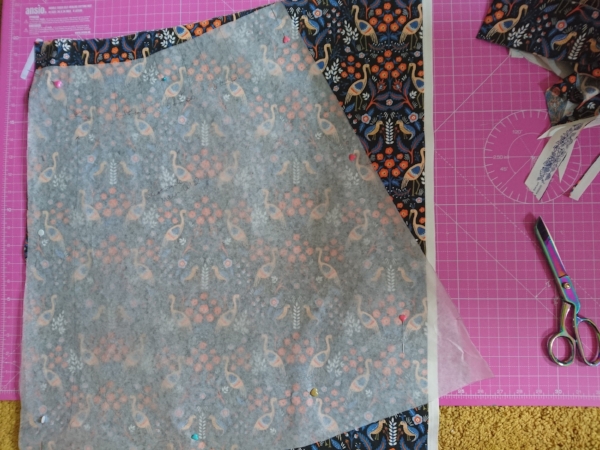
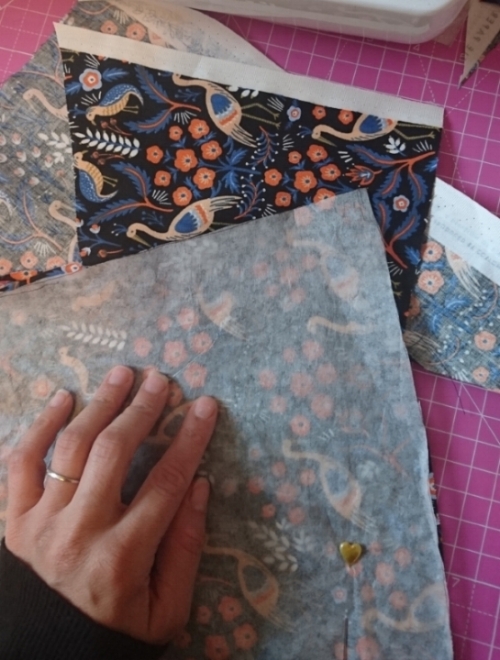
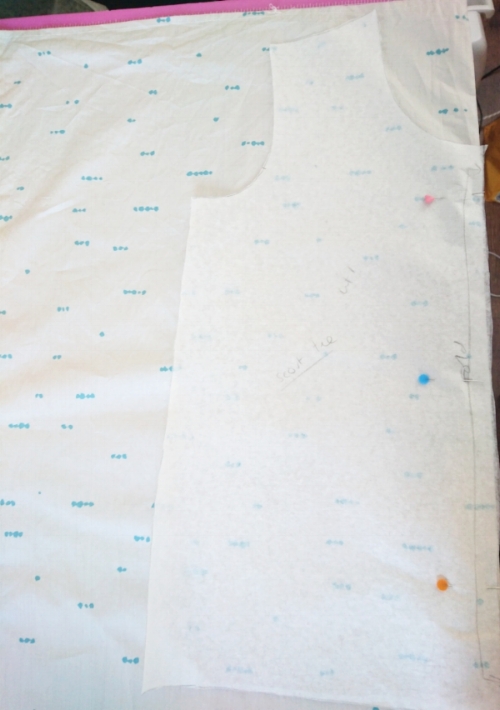
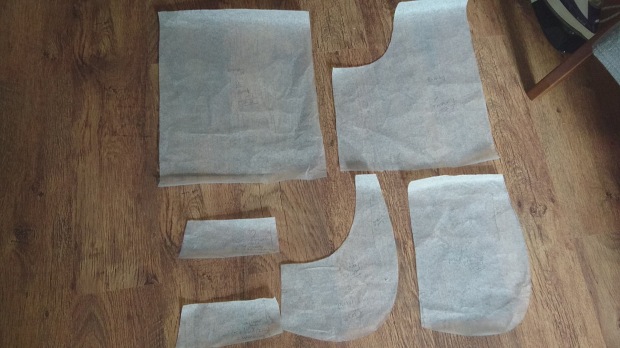
I traced all my pieces using Swedish Tracing paper, and this is why I do this, as I had to re trace the size again when I messed up the bottom half.

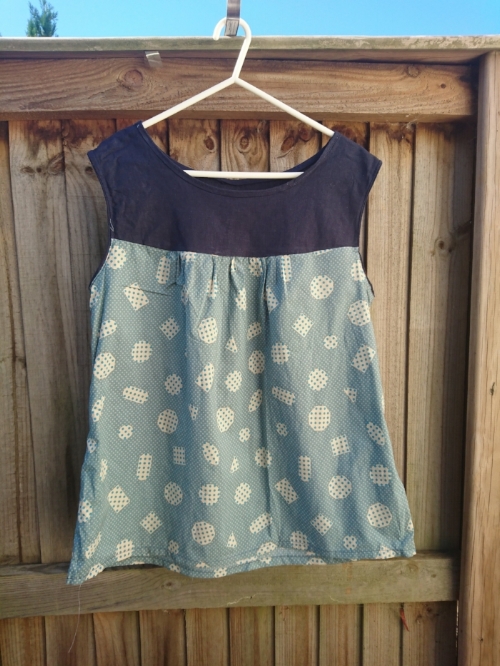
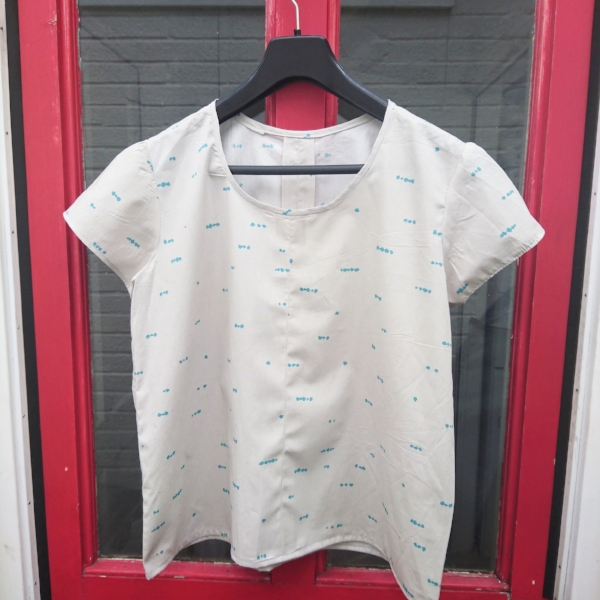
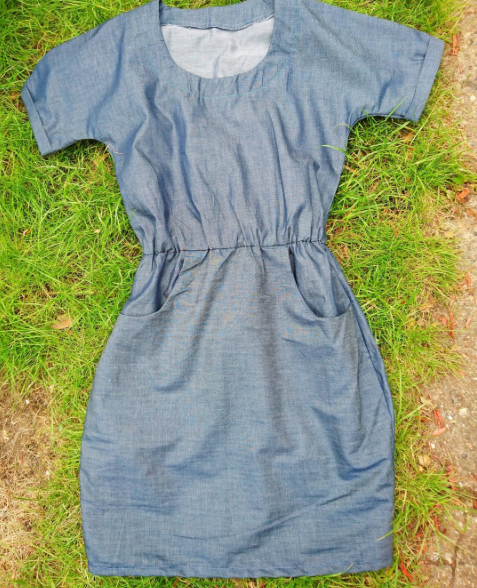
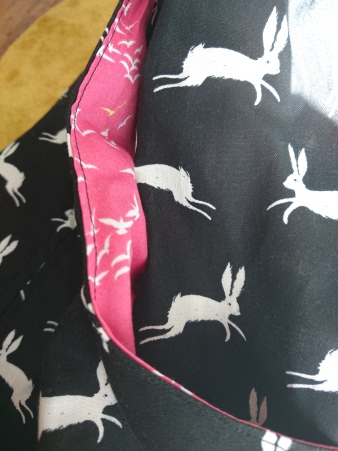
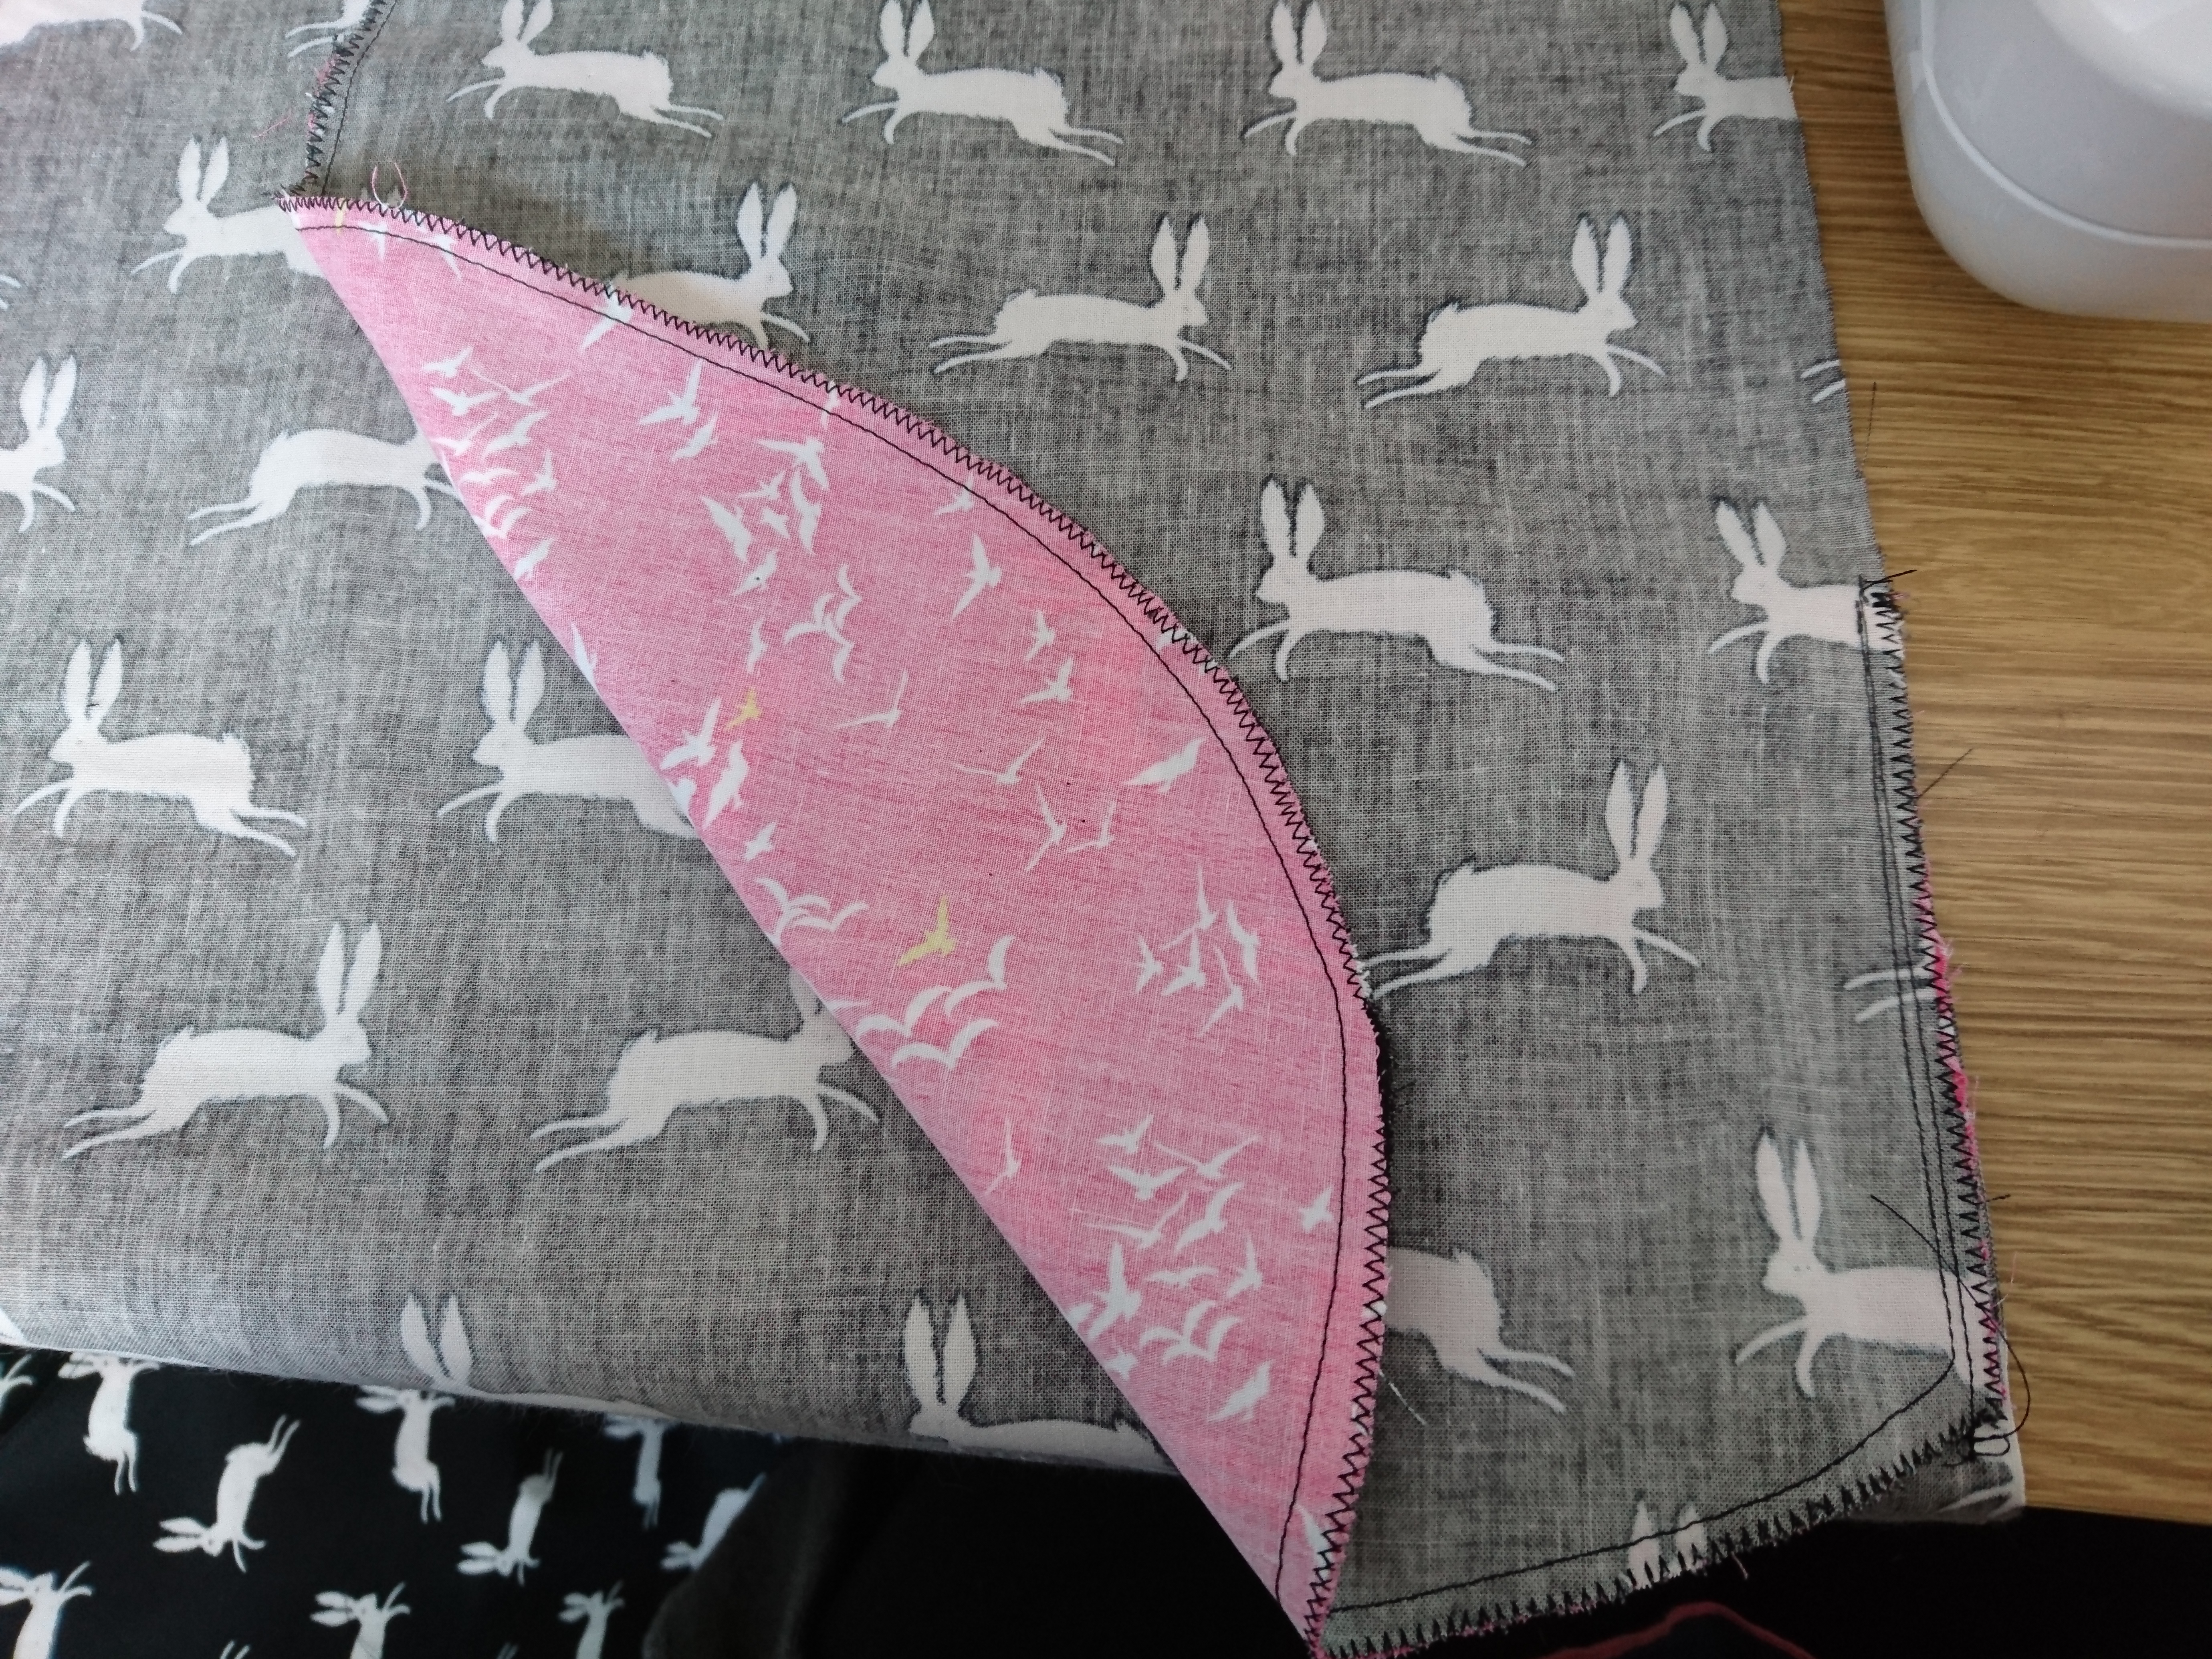
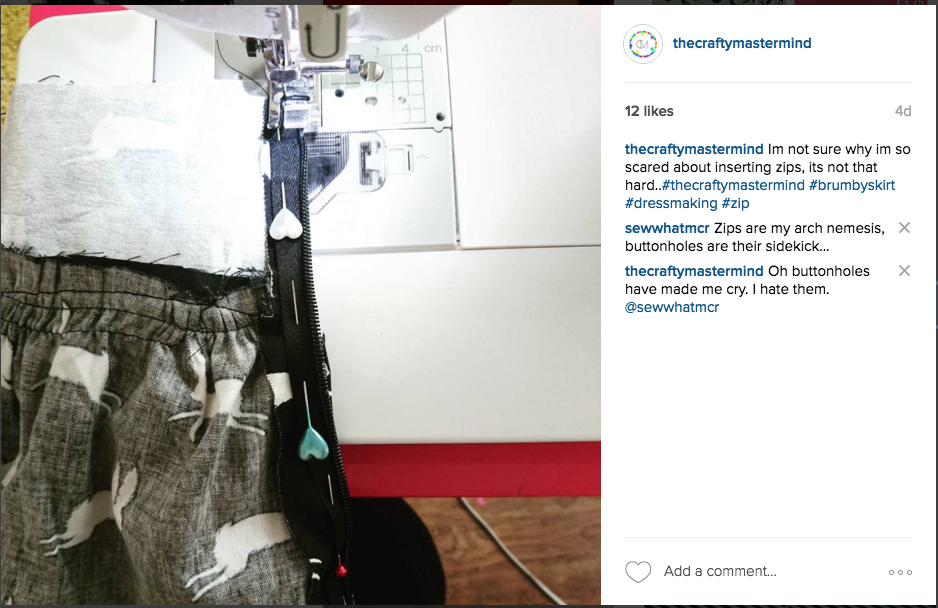
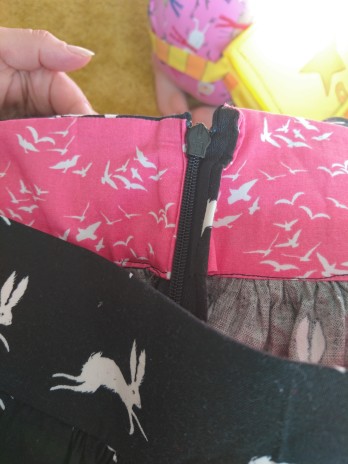
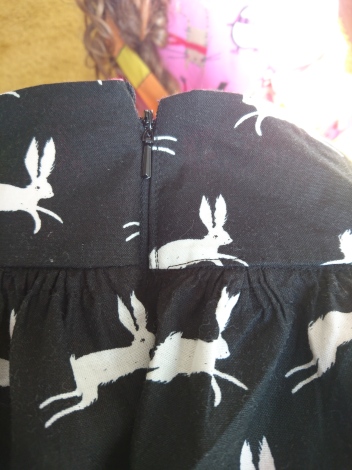
The bodice came together really easily and quite fast. What I really do want the more dress making I do is an over locker, my zig zag is ok, but it really needs overlocking.

static1.squarespace

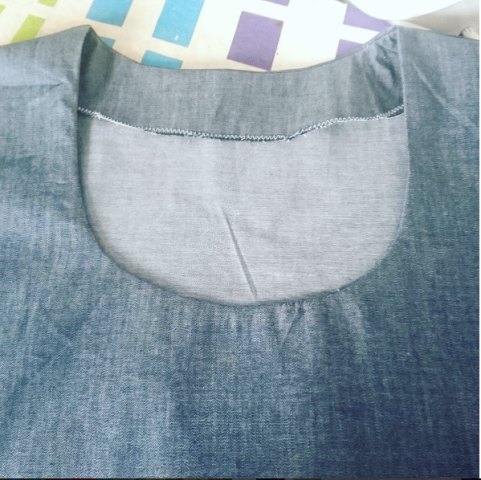
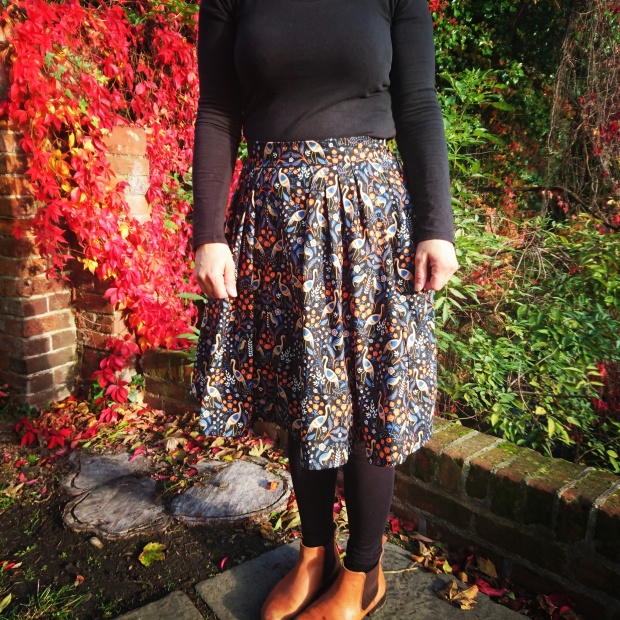
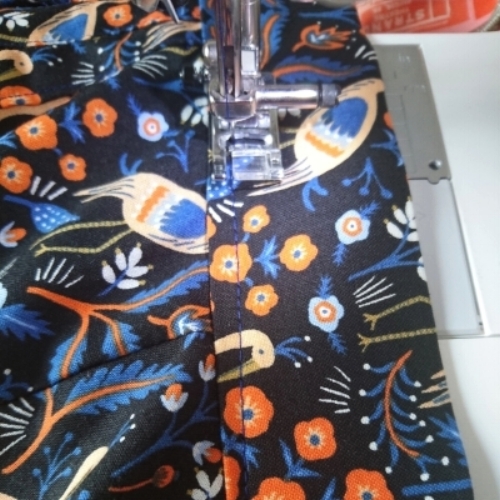
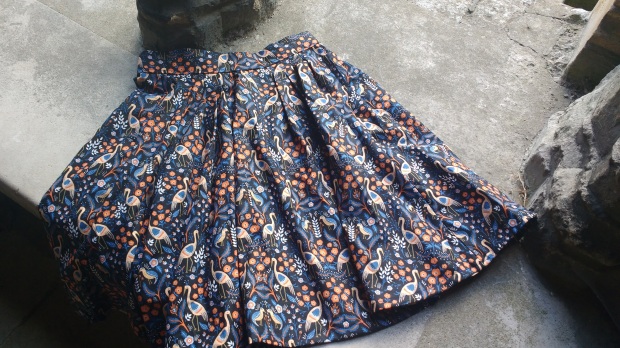
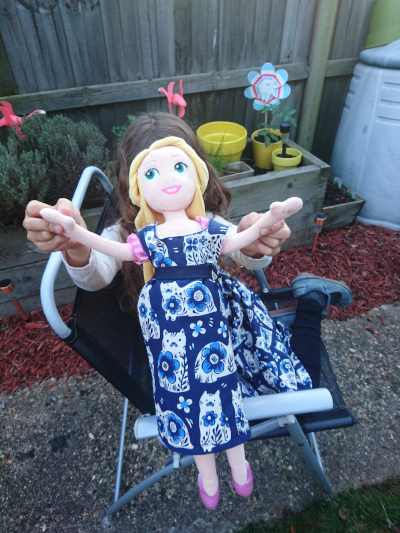
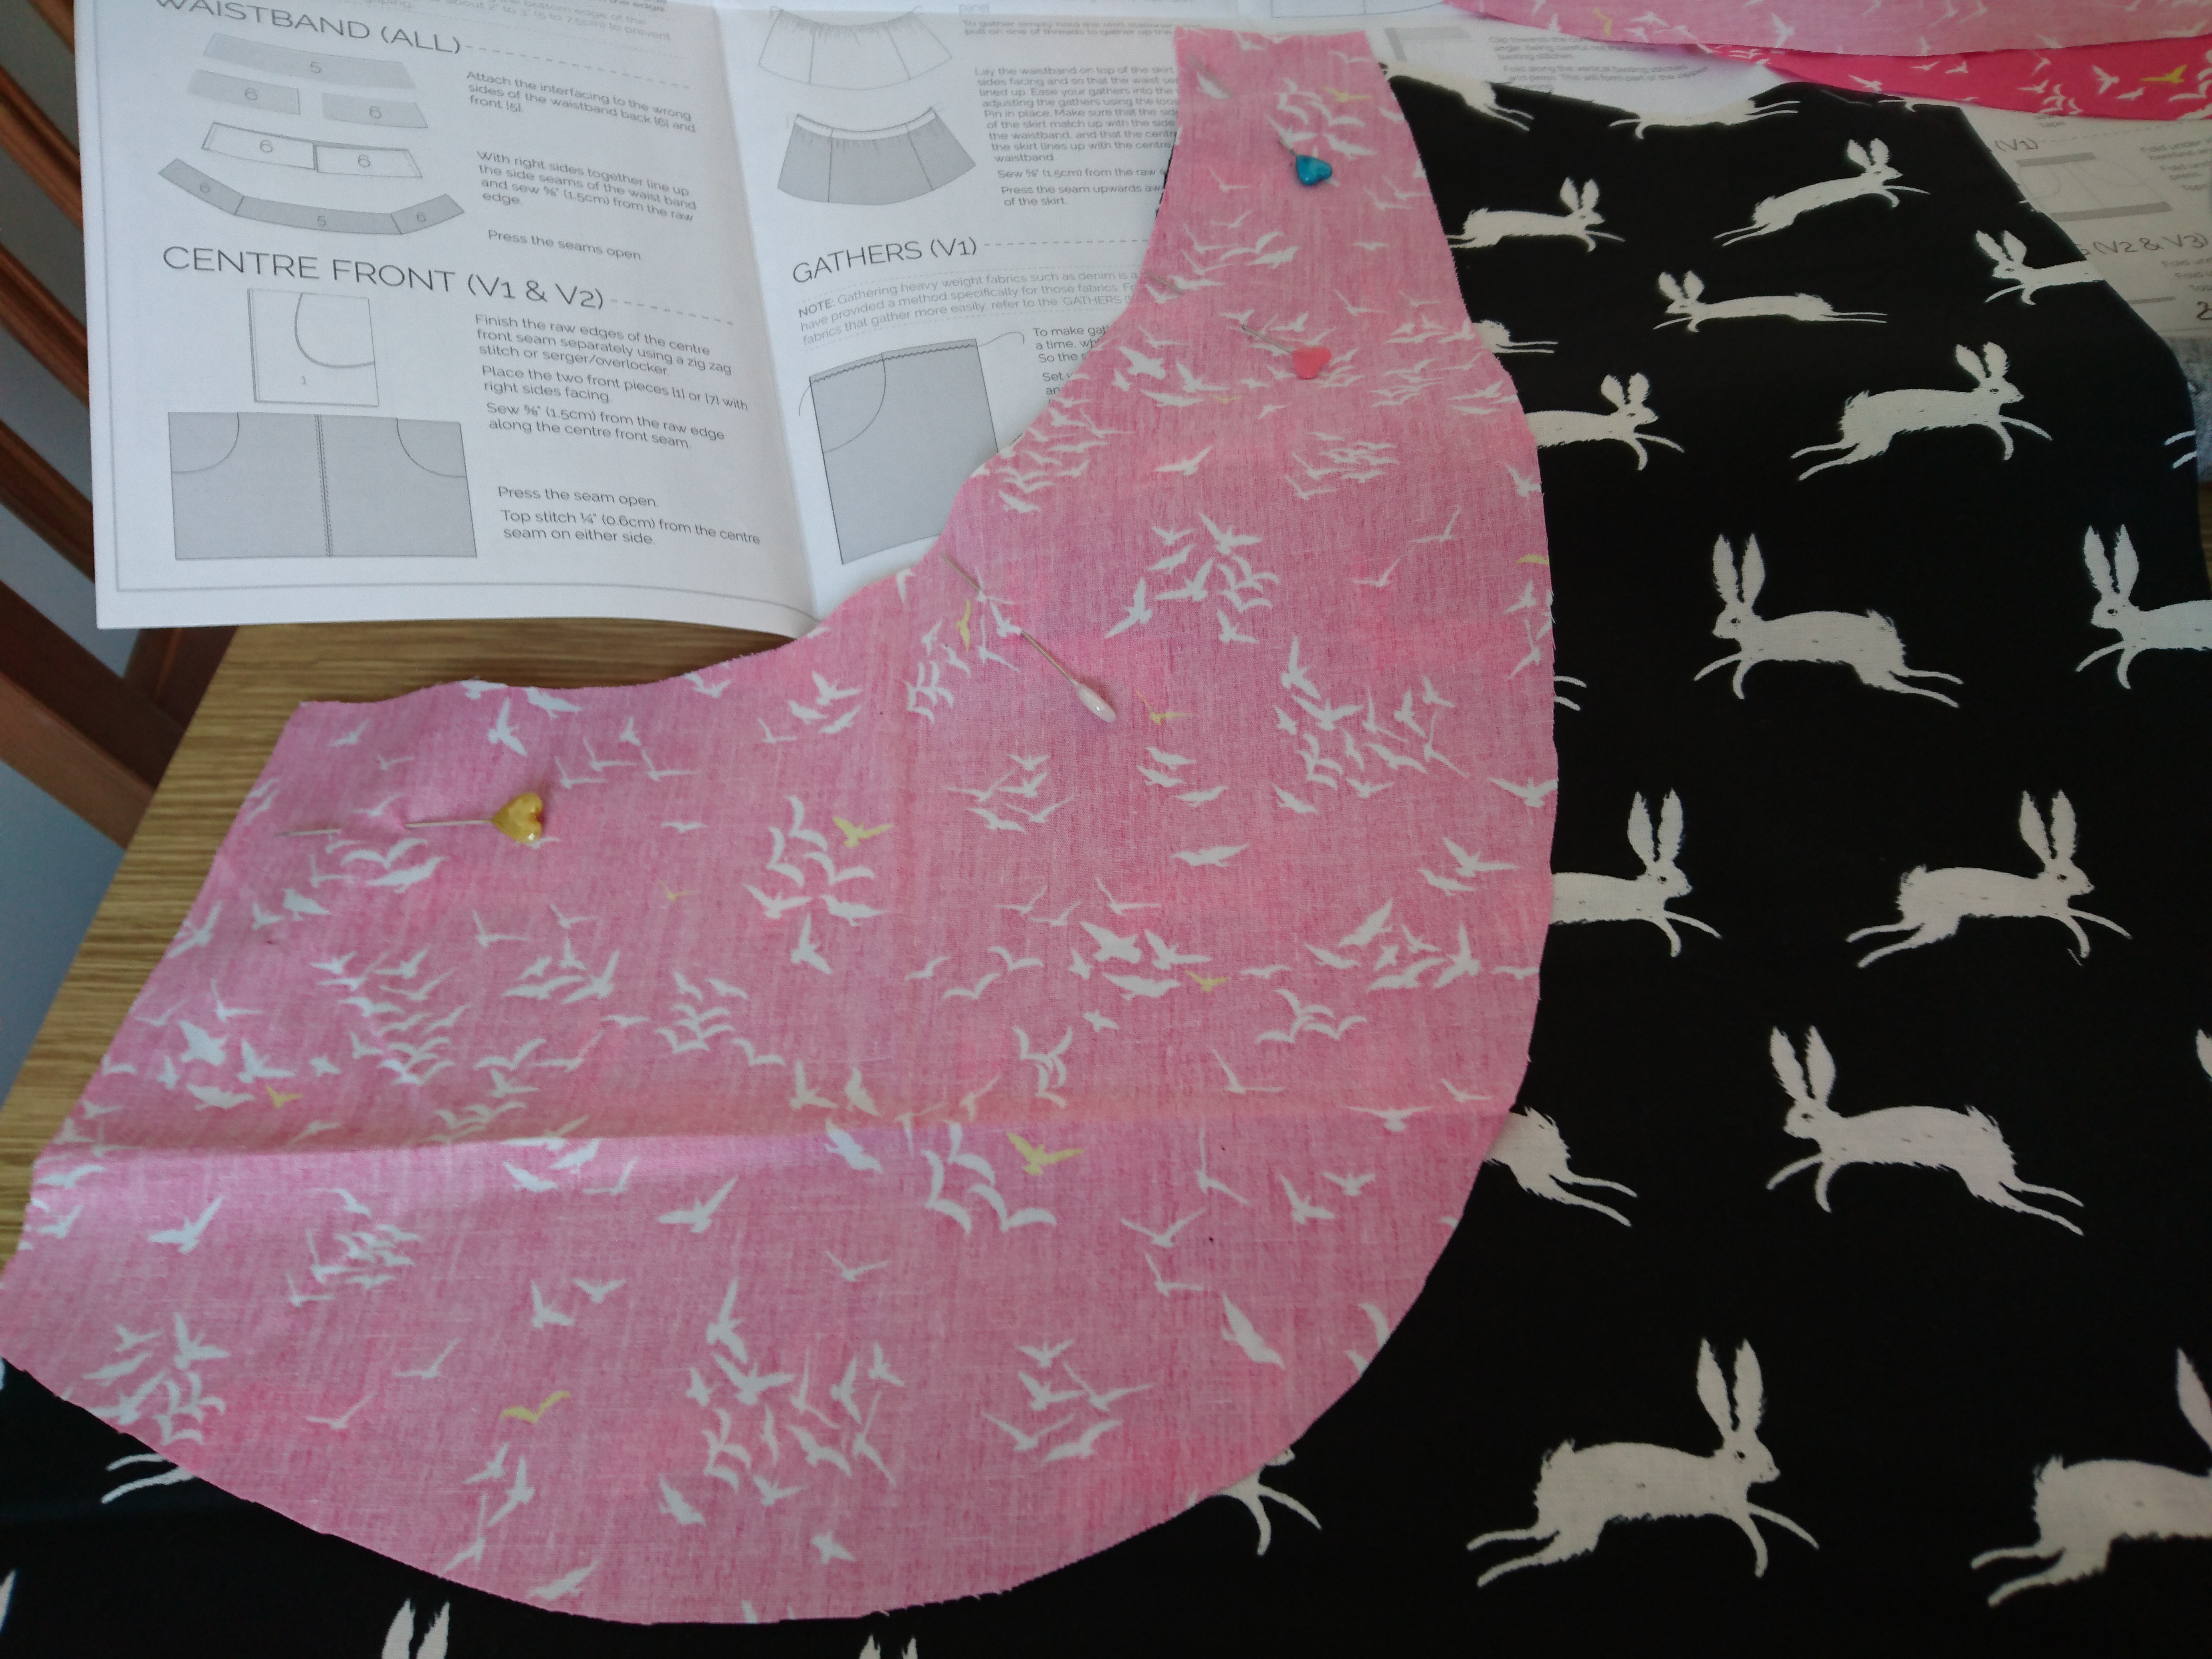
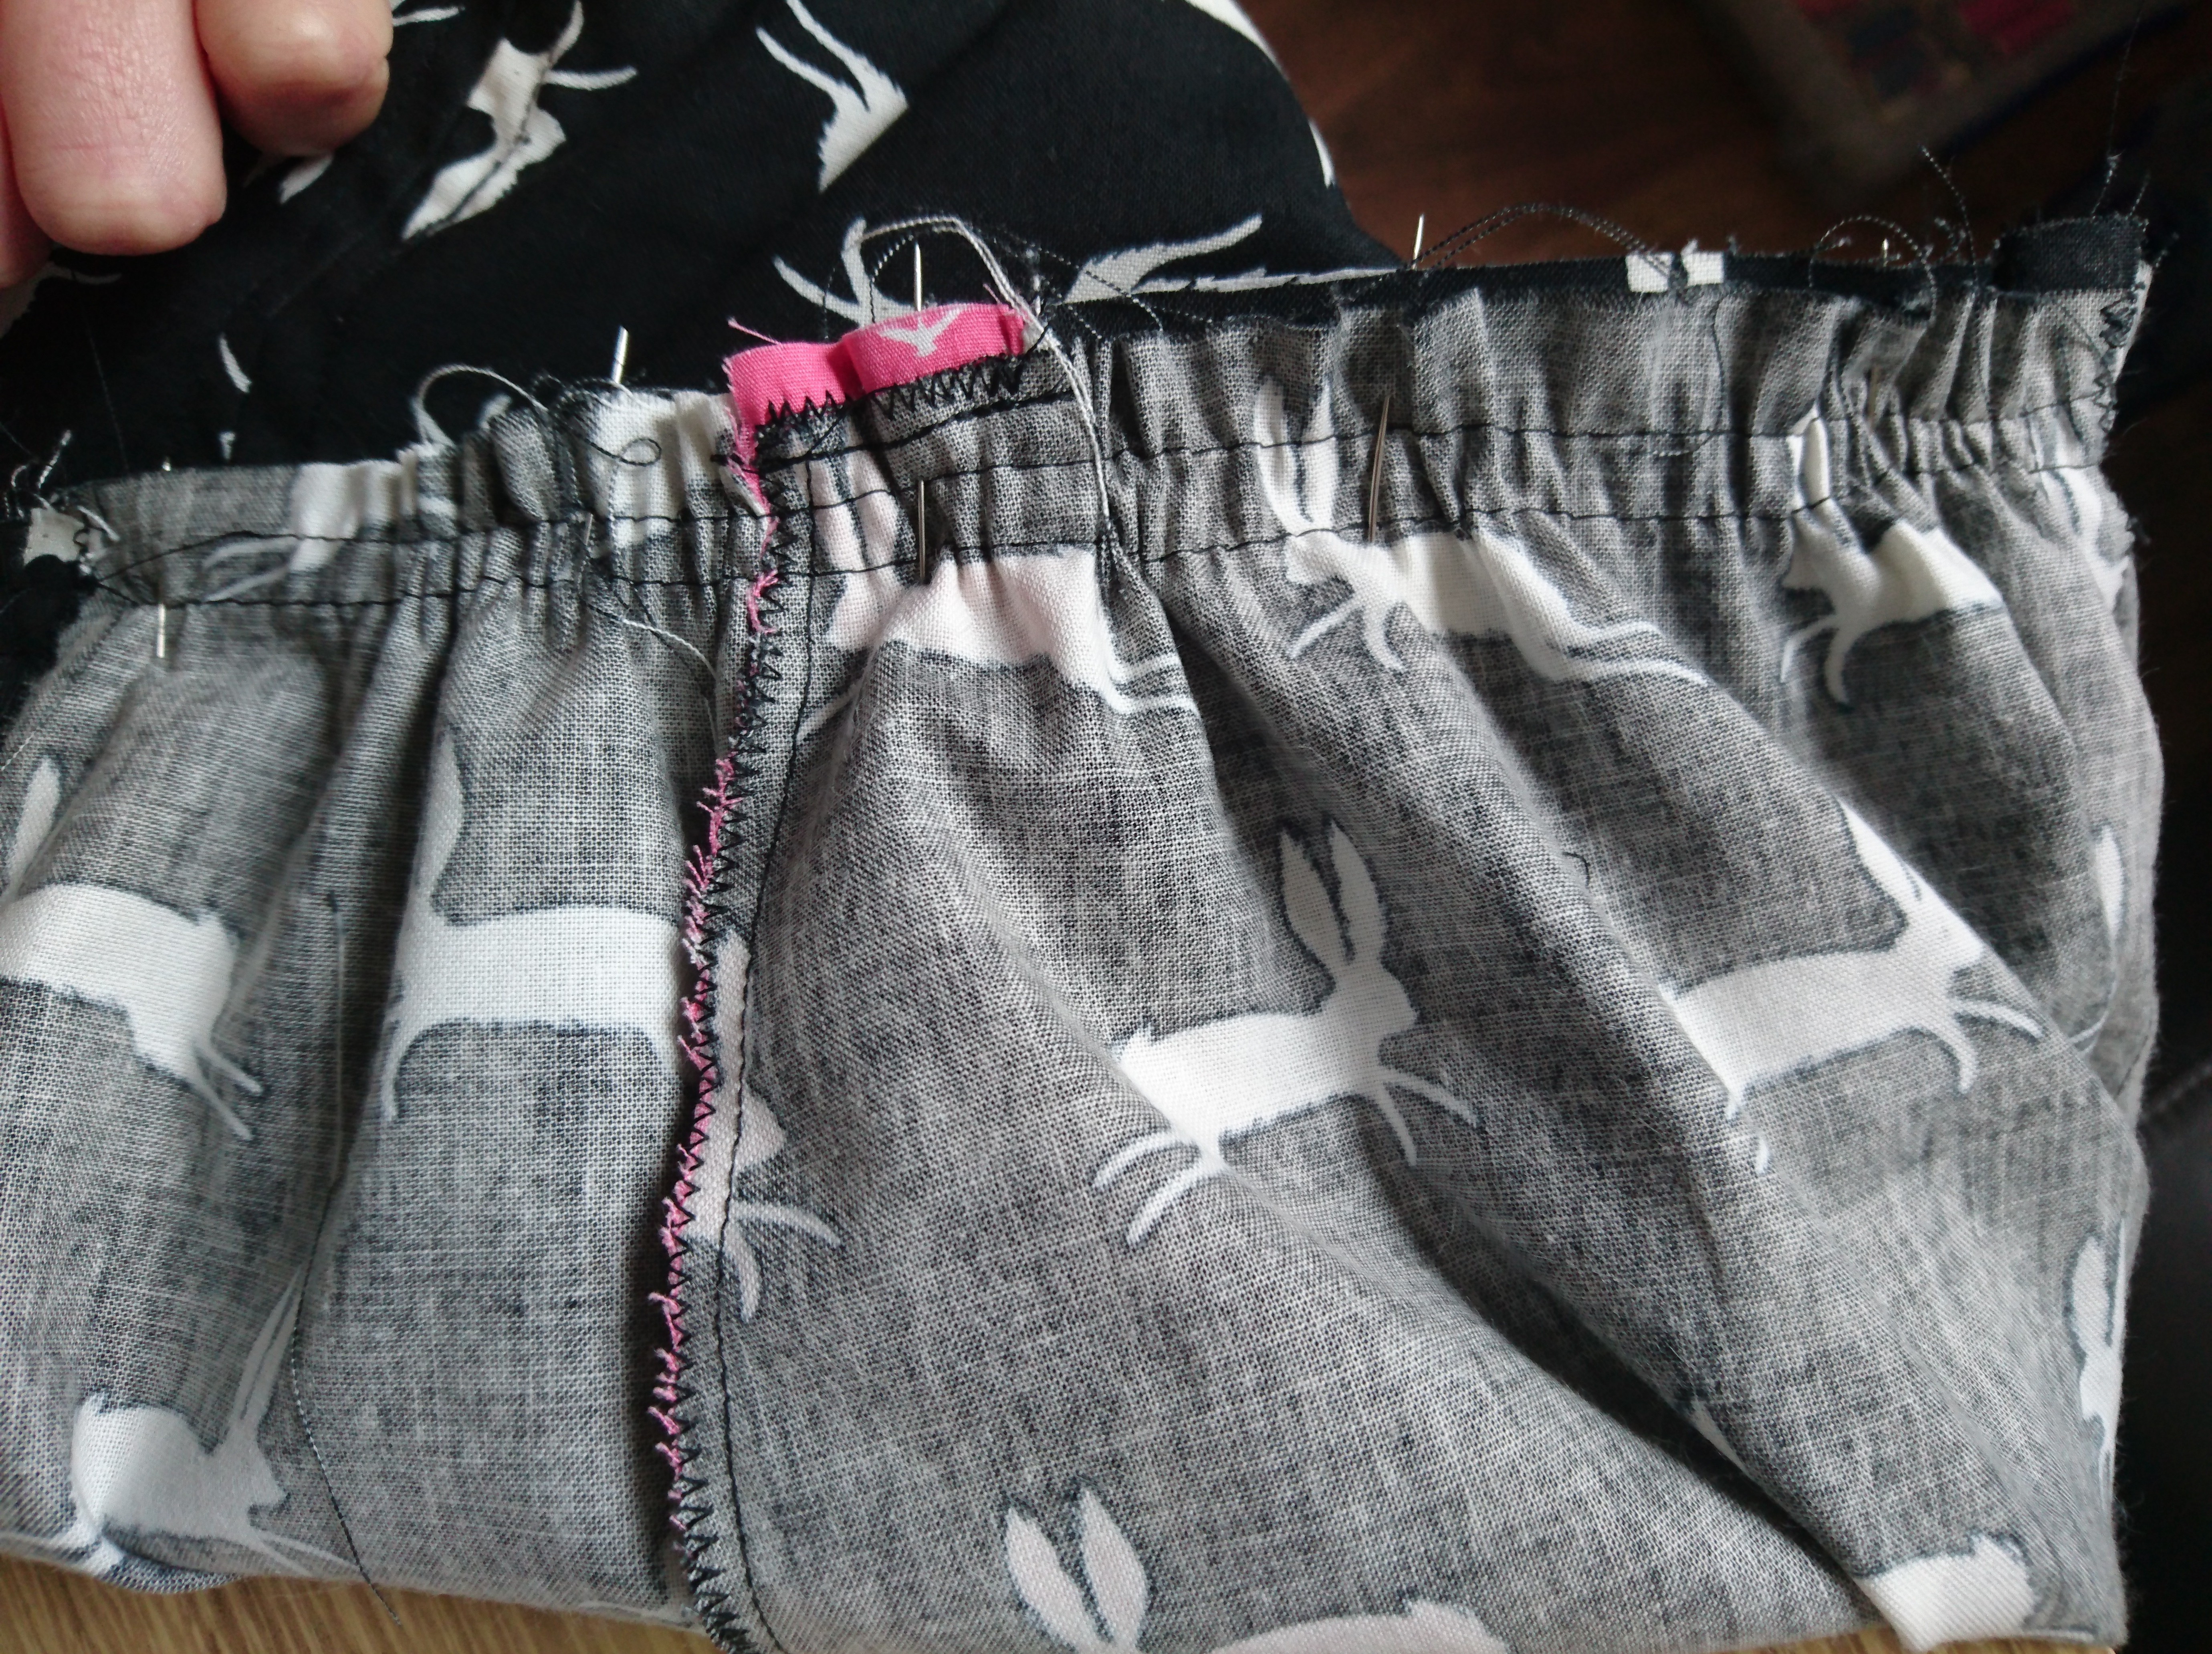
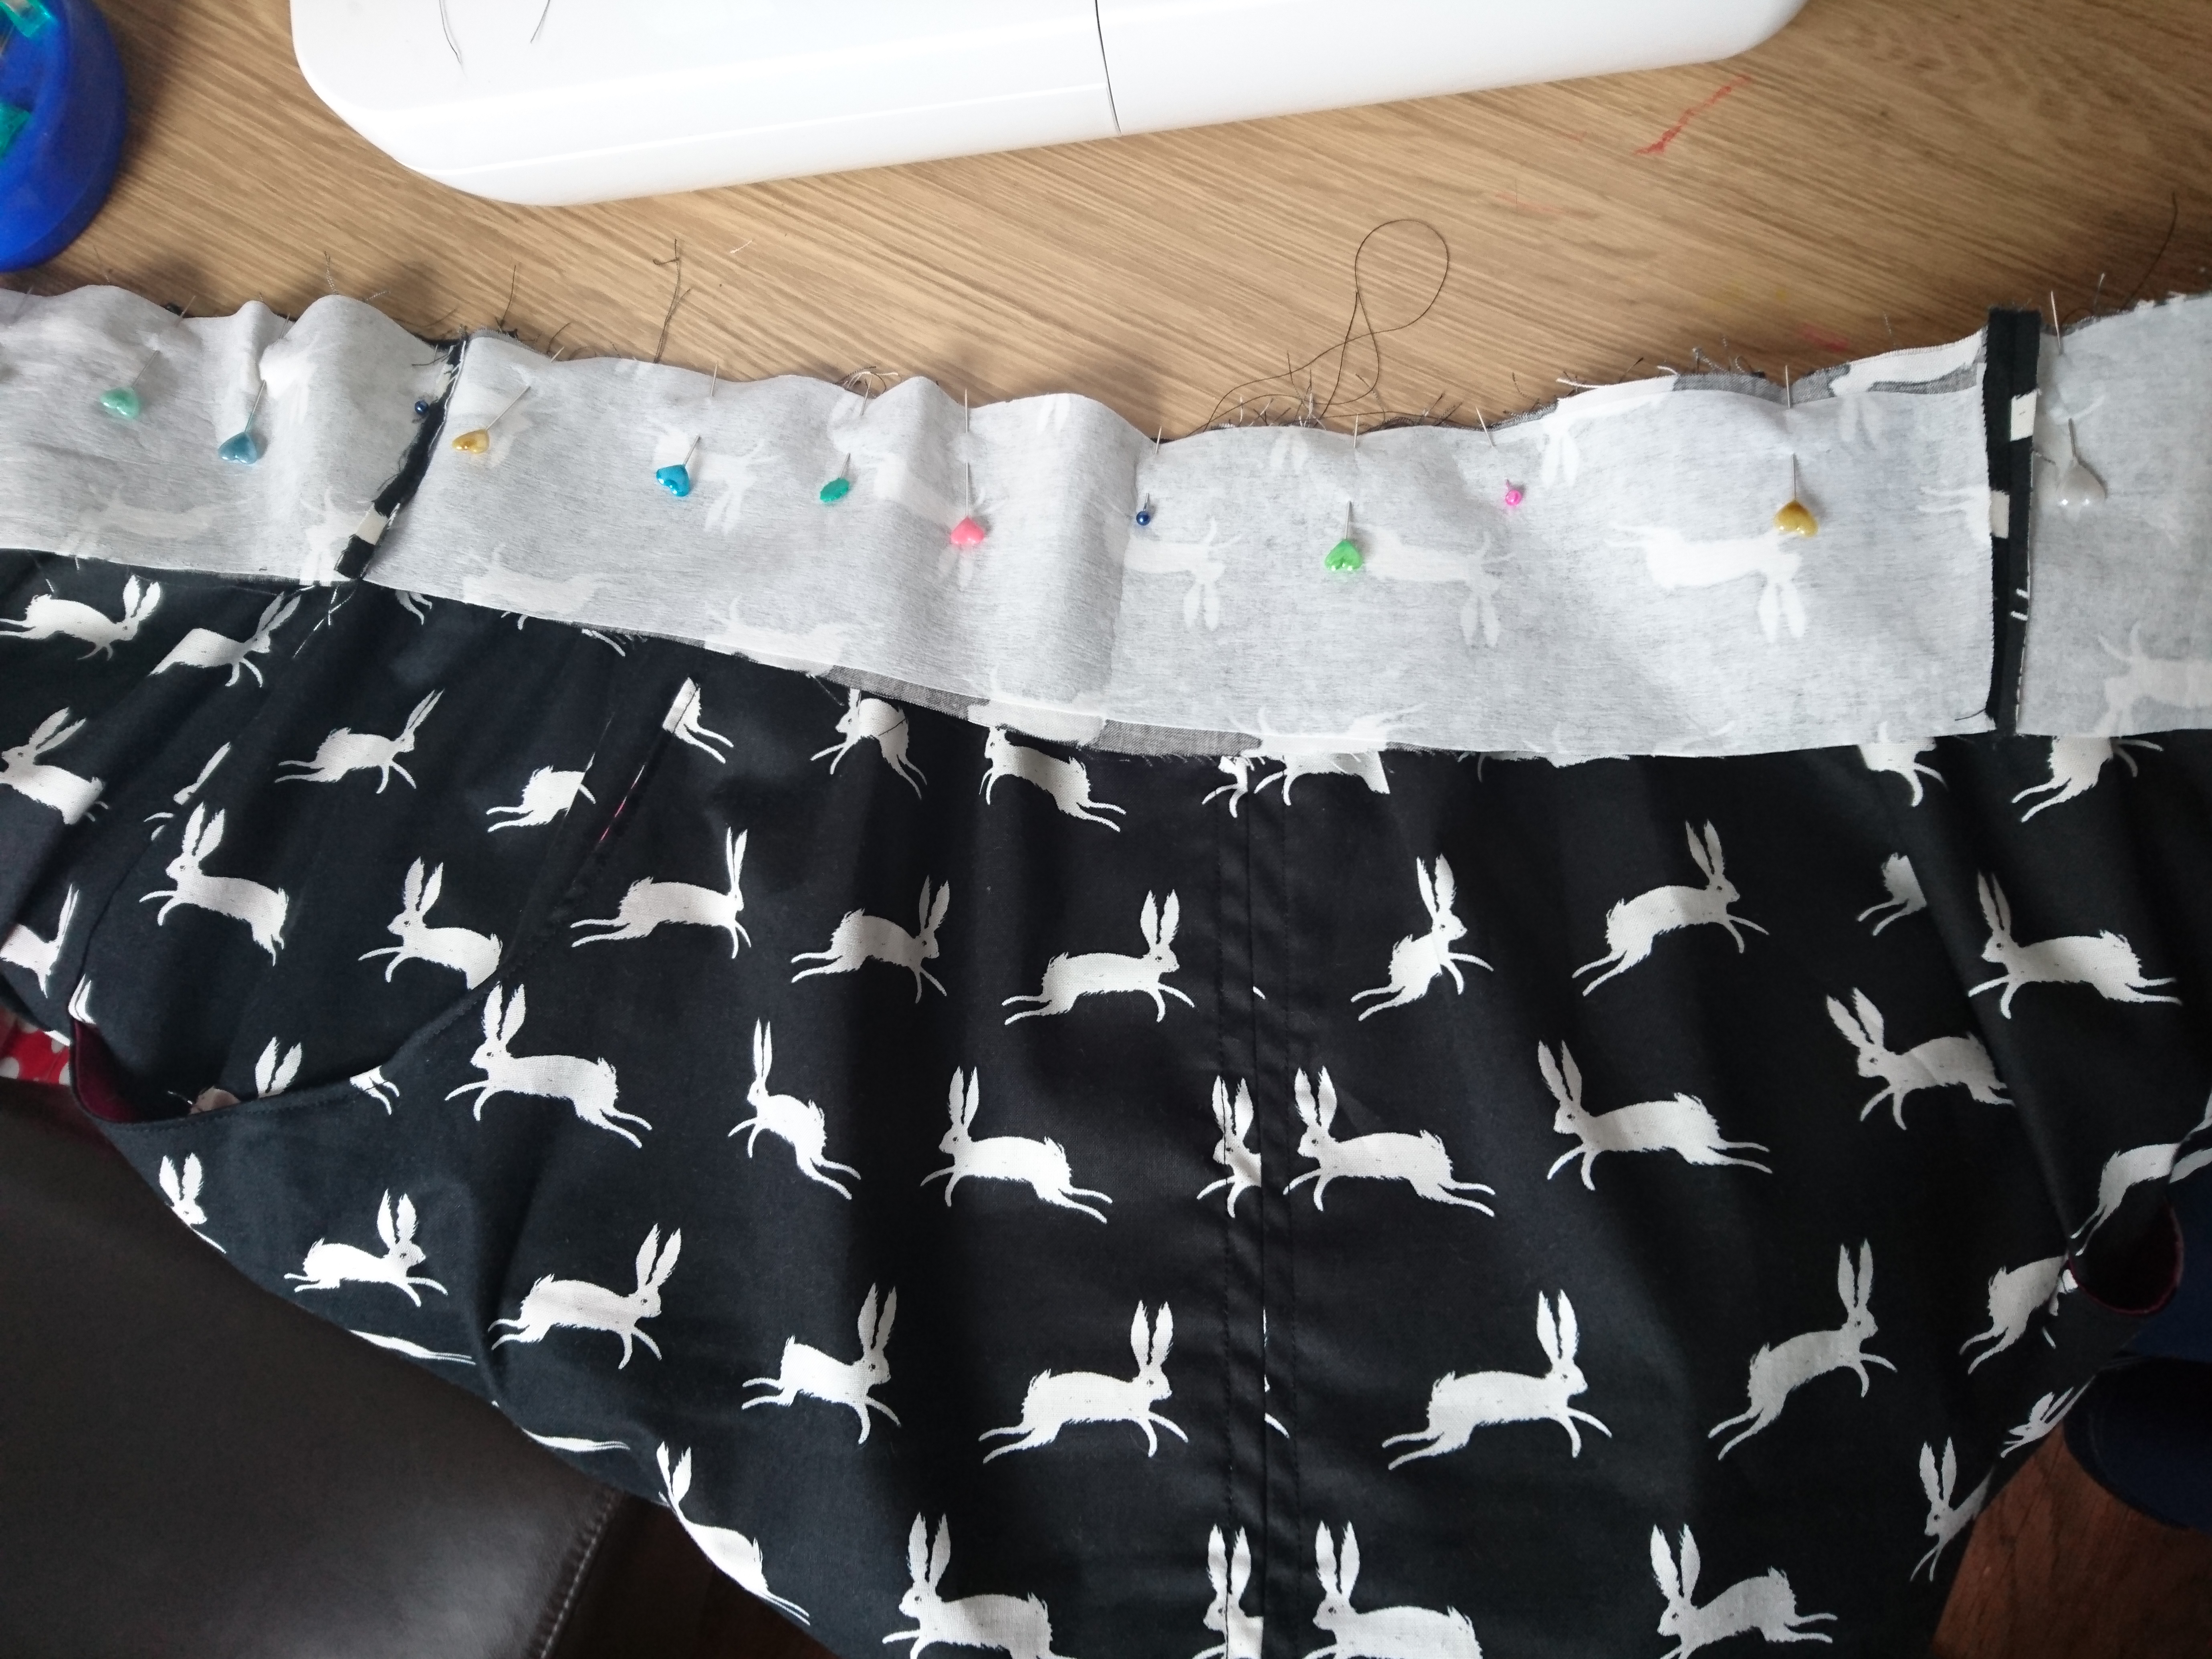
I did the pocket version , because for me a pocket is essential in all of my clothing. I like walking around looking cool and nonchalant with my hands in my pockets. The first version all came together well, and then I had to put the elastic in…but as you do, I left it, and came back to it a few weeks later

static1.squarespace

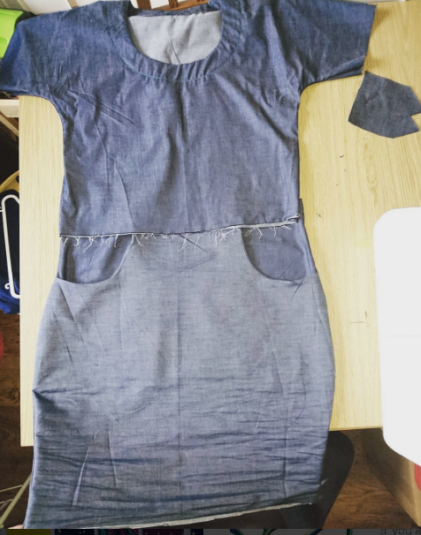
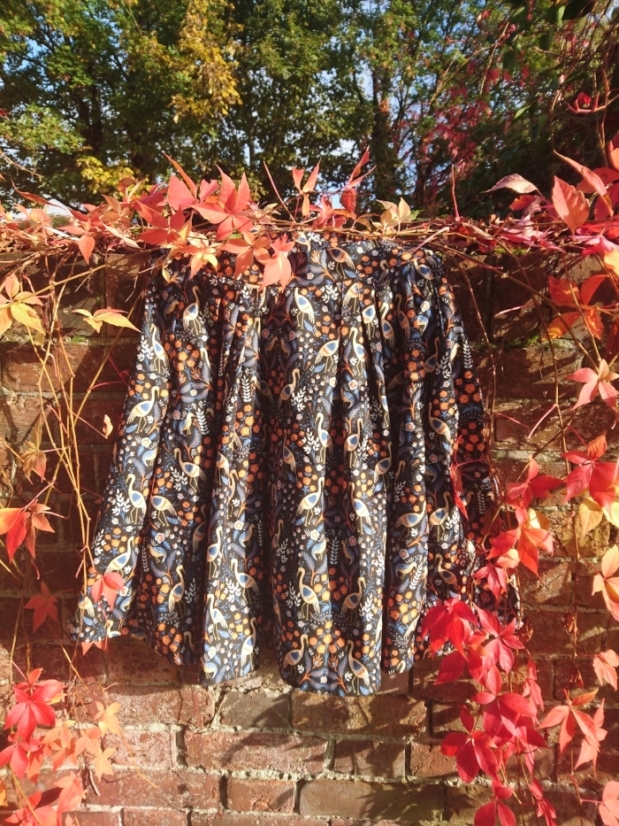
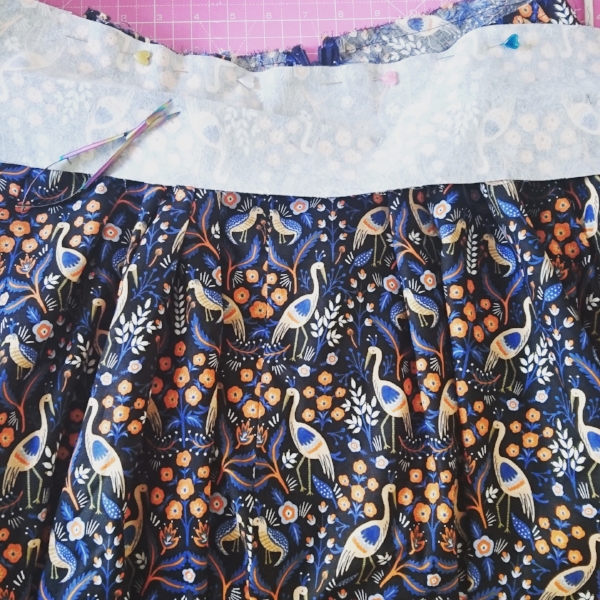
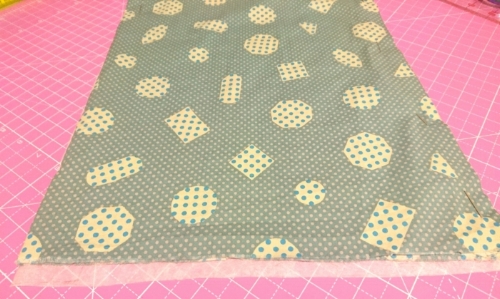
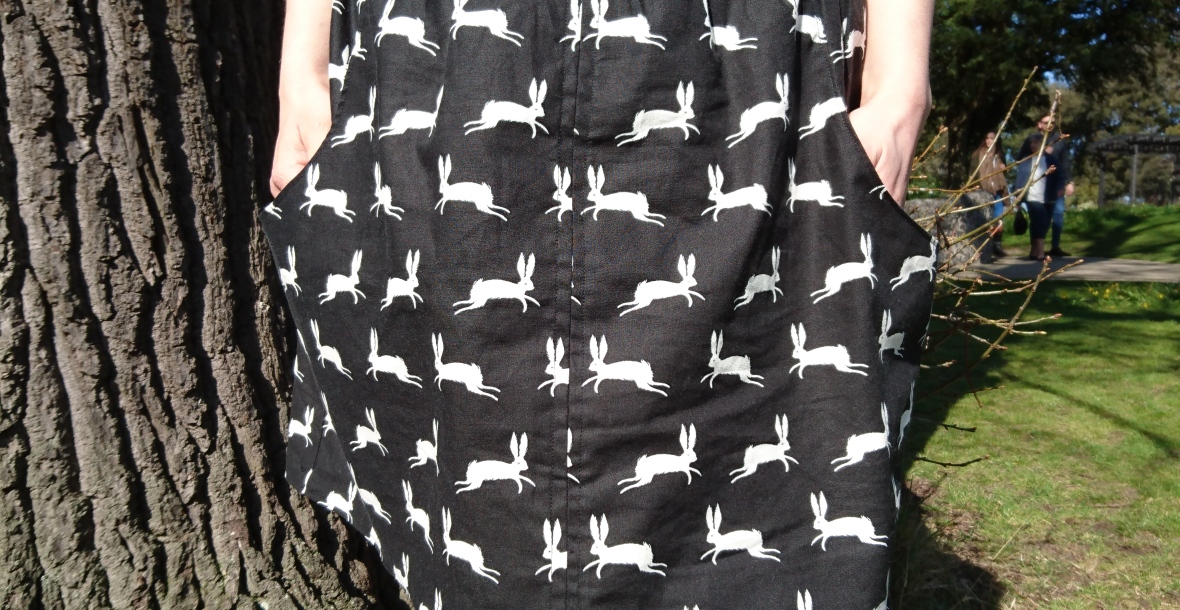
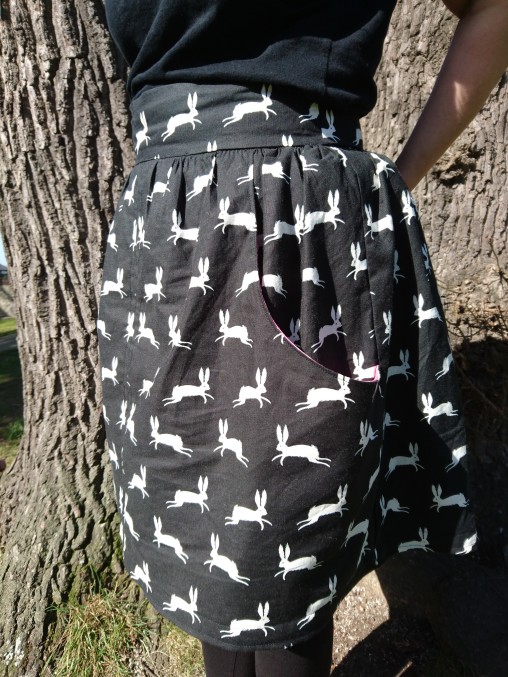
So it’s a few weeks later, and I thought best to try on the pieces before I sewn it all together. The top was fine, but I wish I knew what happened (biscuits) to the bottom, because that was snug. As you can see on the picture above (the lines at the bottom are the give away). I didn’t want to make the whole front panel again so I just took the back off and made it a size bigger.This is apparently an old tailors secret, how they made garments slimmer- top idea.  It worked, it looks a bit hippy. If I make it again, I’ll make it less fish tail at the bottom .

static1.squarespace

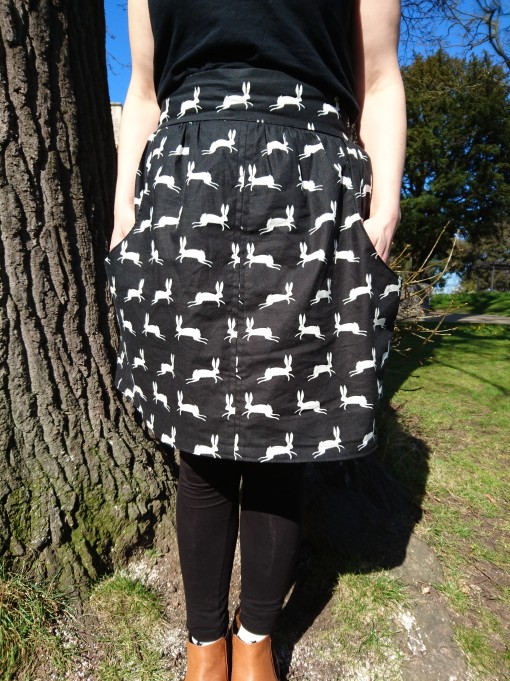
For some reason, every time I look at this picture I can hear the song Big Bottom by Spinal Tap.

I just realised how different my language is on my store blog as oppose to this one. We’ve know each other for awhile now- I feel I can be more relaxed.

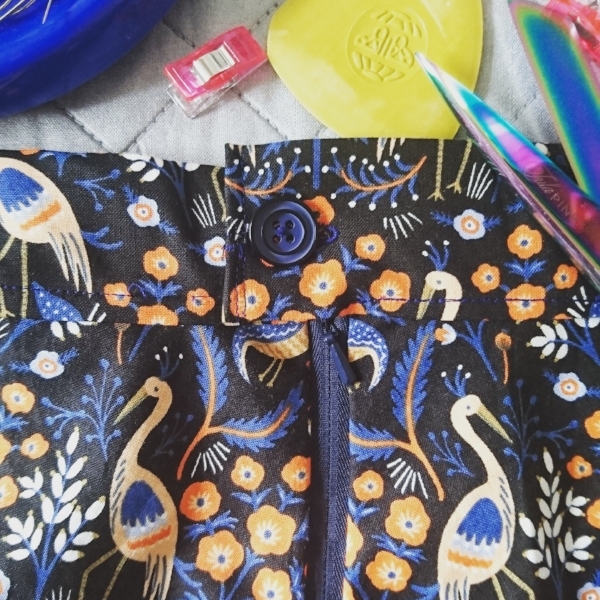
It’s nice to wear, if only I had made it more roomier. I can’t wear leggings with this, it’s like that 5 mm or extra fabric underneath is just too much to ask (and that was after I made it larger!) Maybe I’m giving myself too much seam allowance? I just wanted to get it done in the end as with most of my makes. For example that Nerogri men’s shirt is almost finished shirt is still sitting in my basket a year later just because I put the placket sleeve in upside down and I really cant face it…so close , so far away. I tried this week after I finished the Bettine, I was like “YEAH , BRING IT, I CAN FACE ANYTHING!!” Then rockette woke up and came downstairs and I had to do breakfast and then Adventure Time was on and I said, I’ll do it tomorrow…..which I did not.

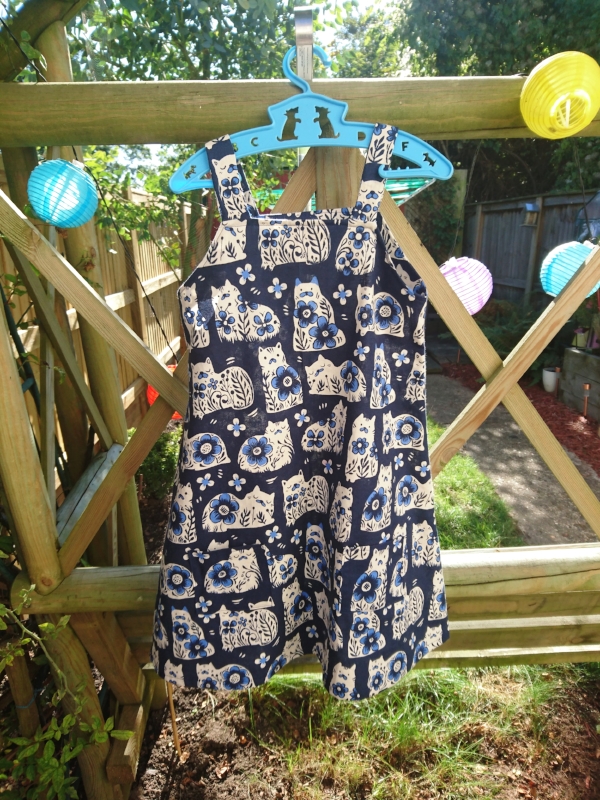
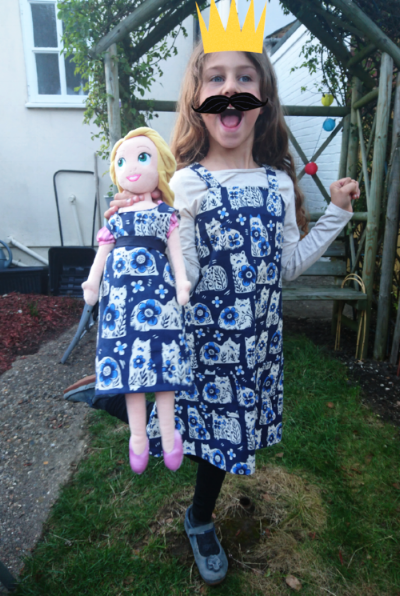
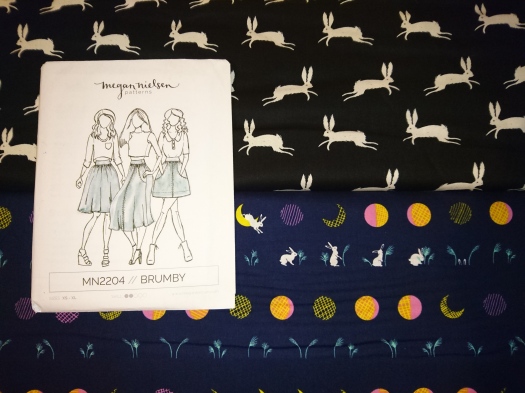
I’ve started on a kids dress which shouldn’t take that long. Who mentioned unfinished quilts? No One? Good.

Great British Sewing Bee has started again, and Tuesday morning a colleague said to me (as with bake off..another person tho) You should be on that show, you would be great on it. Again let me explain why, purely because I would be the sweary, loose cannon ,wild card that would be screaming at the end of each challenge “shit shit ,Oh F^&&^£k this who’s got a GLUE GUN ? STAT!!” I panic even watching that show, it would only go bad if I went on it..plus I don’t really have the skills…the ballroom dress skills..If I did I’d be making my own wedding dress. (I’m not having a ballroom gown though).

You can get the Bettine dress pattern, the fabric and all the other bits from my shop The Crafty Mastermind, but hey- you already knew that!

Enough of this gas bagging. TTFN.

BTW- Lack of Eurovision comment this year. I still can’t talk about it, it’s too painful, and too infuriating.


Glitter joy.

glitter jarsWell what brought this about? Well I’m (finally) getting married this August, yes this August..that’s not far away in planning terms. As a song once went”money too tight to mention” and this has lead us too the D-I-Y weeding of the century. I’m no stranger to doing parties on the cheap..looks like pintrest, came from e-bay kind of thing. But this is hardcore, multiplied by a thousand.

Were going for bright laid back BBQ so I have confetti punches and round punches and glitter all over the house. So I started making the centrepieces. I have seen jars very similar to these in my local fancy department store selling for about £4.50 each.  But I thought I’ll give it a crack see how it goes. Was pleasantly surprised. Even though my kitchen has suffered.

This is a good thing to do with kids too , Rockette made some mess but on the whole did a good job after I touched it up.

All you need is old jars, PVA glue and some glitter. (look for big tubes at discount stores like b&m bargains for  £1.69 and e-bay etc as you do use a lot of it. I know paper chase have nice colours but your going to push doing even 1 jar with their little tubes.
DSC_0153First just squiggle the glue round the jar. If you wanted to do a half covered jar, you could always cover the point with masking tape for an extra neat finish (I was lazy)

Then get a paint brush, or like me a cheap plastic kids knife and distribute the glue evenly around the jar. One important point here. If you are doing a half jar, make sure you don’t have any glue on your fingers when holding the jar from the inside. Its very difficult, nigh impossible to remove later on.


On the first go we laid the glitter on the plate and rolled the glue in it. This didn’t give proper coverage. Its better to shake the glitter over it and let the excess catch in a plate underneath.


DSC_0155DSC_0156


Let it dry. Let it dry then put on another coat of pva glue…thats it..looking good.

glitter 2

Just make sure it’s evenly distributed, sometimes dabbing works better.

finished product

Not sure how robust they will be, but they have been sitting on the microwave for a couple of days with no probs.

Like I mentioned earlier, my kitchen suffered. Put down some sort of newspaper or cover. I can’t vacuum or mop it off the floor either . Im not complaining too much about it, it looks a bit magical.

messy kitchen


In the shop the big news is that I’m taking pre orders for Tula Pink Hardware! This is a first for the UK  (I know can you believe it?) If you wanted some awesome sewing gear just head on over to the shop! www.thecraftymastermind.co.uk

Screen shot 2016-04-09 at 16.28.47


Things that still make me homesick

I’ve lived away from home for so long my homesickness for Melbourne is fewer and further in between, but sometimes It flares up. Normally this will happen In January and its cold, wet and miserable in England and I yearn for the big blue skies and northerly winds that burn your face off.

Other times , when things feel a bit complicated and I want to go back to a time when I was a lot more baggage free. This is when I get homesick.  And then sometimes, like today I was listening to an old album by The Ice Cream Hands while avoiding all other jobs that needed doing, whilst claiming putting together a play list is “an important job”.

Music is a funny thing preying on emotions and bringing up feelings, such as home-sickness, or to pin point a particular time. The thing is, if someone said what does it feel like? I couldn’t answer it. More like if you get the chills or pins and needles, but in a good way.

It reminds me of the time when I was a wide-eyed kid and had to Interview someone for a school project and in some weird way it came about that I could interview Chuck Jenkins who would go on to be in the Ice cream hands, but at the time was in a sadly ignored band called the Mad Turks (this could have had something to do with the shit front cover).

front.jpg

Champagne glasses are a nice touch.

I asked him a few dumb questions because I was only 15 and he answered them in a very dickish way like a snarl wrapped up in a leather jacket. I went away with his record,and a signed poster. The record I didn’t play until I was 20 and loved it & the poster I gave to a second-hand record store. I don’t blame him for being a dick, he was 25 and probably thought he  deserved more than sitting in a 80’s designed office and have to tolerate a kid who hasn’t heard his music. Poor snarling man, I love his work now, no damage done.

All this from one video.


I’m not sure how this blog ended up finishing like this today, It was supposed to go another way,  but there you go.


Easter sewing joy.

As it’s Easter I wanted make something using some of the great bunny fabrics we stock, although I couldn’t choose between Ghost bunnies or the Moon bunnies. What I did know was that I wanted to make the Brumby from skirt.

brumby.jpg

It had a zip, so was hesitant (I’ll get onto to later). But I gunned for the ghost bunnies after asking on instagram. For the inside pocket detail I used some of my own stash, bright pink with birds was a good contrast even if you can barley see it.

pink sea.jpg

Used my  Swedish tracing paper again, loving that stuff! I then measured out just under a meter and a half (130cm to be exact) of the ghost bunnies for the medium size. It was so easy to whip up, I mean super easy. If it wasn’t for the zip, I would say this is perfect for a beginner. Unless that beginner wants to learn how to put in a zip.

swede.jpg

I’m always too excited when I make these kind of things, so as usual I didn’t pre-wash my fabric, but being med weight cotton it should be fine.  But the pattern matching in the middle I probably should have thought about more. But in a weird way I like the half rabbits, like they are synchronized.

skirt.jpg

The instructions were straight forward, but perhaps made some of the steps sound a little more complicated then they actually were. The pockets were fun to make and easy.

pockets raw


zig pocket

I also didn’t have any problems with the gathering as I had in the past. I was worried that the waist band was going to be to small but once I attached it, it was a bit big really. Although I think by the time I got to the waist band, I was doing what I always do and just ignore the rest of the instructions and make it up as I go. Because of this the inside waistband had a raw edge which I folded under but the stitch work is pretty wonky under there. Too wonky to take a photo.

gathering

attaching band

Shall we talk about zips?  The instructions with the pattern seemed a little bit complex, and as it’s only my second time putting a zip in I went to my trusty Love at first stitch and followed Tilly Walnes tutorial.

OK I got cocky, I put up on instagram this…

Screen shot 2016-03-28 at 20.24.31


But I was only half way through, dick. I wasn’t concentrating when I put the 2nd part in it sewed it on the wrong side of the skirt. Being stupid I didn’t realise this had happened until I put the skirt on, so all the seams were done, the skirt was hemmed , it was finished. I did contemplate taking it apart to fix it but I just couldn’t be bothered. And besides who was really going to see it?

zip 1.jpg

What people could see was the other dickish thing I done  was not match up the top of the zip. What is with the stupid gap?? Again I could have fixed this but again it would mean a lot of unpicking for something that not many people would really see (stop looking at my arse).

DSC_0094 (1).JPG

After all of that, I’m really happy with it. The interfacing I used was left over from another project and was too stiff for my liking, next time i’ll do it with a soft to medium weight one.

skirt 2.jpg

But it sits well, I didn’t have any difficulty with the gathering or anything like that. It was a straight forward delightful pattern that I’ll make again. Maybe in the Moon bunnies or The Mustang pink arrows for Summer…just need to concentrate more!

DSC_0098.JPG


Im now on etsy!

To Pay pal or not to Pay pal has been a touchy subject when I was building the shop. If I included it, it would have made the website less clean, clunky and difficult as there was no program to automatically include it. But it’s been annoying me that I couldn’t include it . So the easiest way around that was to open up a fabric only store on Etsy.

etsy store

etsy store

To make things uncomplicated for now I’m only shipping to the UK via this site, if you are of International ilk and would like to purchase stuff. Or if you would like to purchase patterns and habdash it will still need to be placed via the shop www.the craftymastermind.co.uk.

Yay well that’s now done!